

How To Make Padded Coat Hangers
Padded coat hangers bring an upgrade to wardrobe organization—offering both protection for garments and a refined visual touch. Unlike standard plastic or metal hangers, a padded coat hanger supports shoulder shape, reduces creasing, and enhances the look of a closet. Creating a padded hanger yourself is entirely feasible with the right base, appropriate padding, and a thoughtful wrap technique. At the core of a reliable padded hanger is a sturdy frame; for example, Jinshunda’s Adult Plastic Hangers offer the foundation many DIYers and professionals prefer. Equally important is the soft foam cover accessory—Jinshunda’s Foam Covers product line—which simplifies the assembly and ensures consistent quality. With this guide you will learn every step from material selection to decorative finishing, so you can produce padded hangers that look elegant and last.
Choosing the Right Base Hanger Frame
The first critical decision is the hanger frame you will use as the foundation of your padded hanger. A weak or uneven frame will compromise the padding, cause sagging or deformation, and shorten the hanger’s lifetime. For best results, the frame should be:
Dimensionally consistent with the garments you plan to hang (adult vs children, heavy coats vs shirts).
Smooth in surface, without sharp edges or welding marks that could pierce or wear the padding or fabric.
Strong enough to support the added bulk of padding and fabric without bending.
In this regard, a premium injection-molded plastic hanger from Jinshunda offers significant advantages. The adult plastic hanger series features reinforced shoulders, consistent mold finish, and sufficient hook strength—making it an ideal base for a padded cover. Starting with a high-quality hanger frame means the padding will sit evenly, the fabric wrap will remain smooth, and the finished product will retain shape and function.
Selecting Padding Materials and Fabric Covers
Once the base hanger is ready, the next step is choosing the padding and fabric cover. These determine both the functional protection and the aesthetic appeal of your padded hanger.
Padding material options
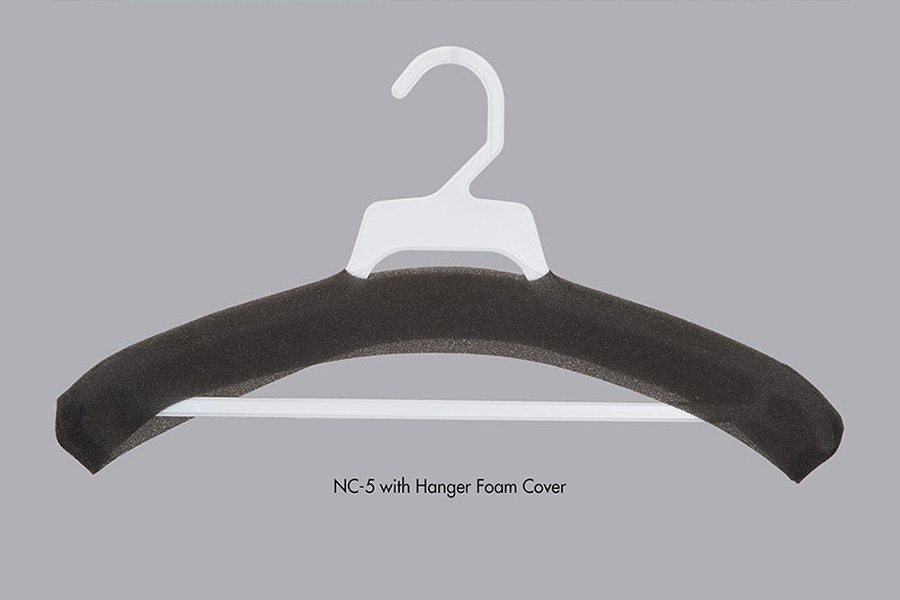
Foam covers (such as Jinshunda’s Foam Covers line) simplify the process: pre-cut or strip foam that fits standard hanger shapes. These covers provide firm yet soft cushioning, maintain shape, and reduce time in assembly.
Polyester batting: soft and mildly resilient, ideal for moderately padded hangers.
Cotton or wool wadding: natural feel, breathability, but may require thicker layering to achieve the same effect.
Foam strip inserts: firmer, better for heavier garments or tailored coats.
When you use Jinshunda’s Foam Covers, you benefit from a purpose-designed accessory that fits neatly onto hanger frames and simplifies assembly.
Fabric cover options
Choose a fabric that complements your wardrobe style, is durable enough to withstand repeated use, and wraps smoothly. Good choices include cotton-linen blends for a natural look, satin or silk-touch fabrics for luxury wardrobes, or velvet for premium garments. Fabric width should be sufficient to cover the padding circumference plus seam allowance. If you plan to match multiple hangers in a set, consider selecting a uniform fabric color and style.
This dual focus on padding and fabric ensures the final hanger both protects garments and enhances closet presentation.
Preparing the Hanger and Attaching the Foam Cover
With your base hanger frame selected and your padding materials at the ready, you proceed to preparation and mounting of the foam cover.
Clean and inspect the hanger frame.
Remove dust, residue, or manufacturing sprues. A clean surface allows better adhesion and smoother wrap.Position the foam padding.
If using a strip or cover from the Foam Covers line, align it along the shoulder area of the hanger frame. Make sure the foam length extends to both ends of the hanger shoulders, and that the thickness is consistent.Secure the foam.
Use double-sided adhesive tape or fabric glue along the underside of the foam to affix to the hanger.
Alternatively, wrap thin thread or use small stitches to anchor the foam discreetly.
Check symmetrical alignment.
Run your hand along the shoulder to verify smoothness and that no lumps or gaps exist. Uneven foam will distort the garment shape once hung.
Jinshunda’s foam cover product reduces the trial-and-error in this step by offering pre-shaped foam accessories enabling consistent application across many hangers.
Wrapping the Hanger with Fabric
Now that the padding is firmly in place, wrap the hanger with your chosen fabric cover. This step transforms the functional padded hanger into a visually appealing wardrobe item.
Option A: Sewn Cover Sleeve
Cut a piece of fabric wide enough to encase the padded shoulder and side parts, plus seam allowances.
Fold lengthwise and sew a long seam to form a tube.
Slide the padded hanger inside the fabric sleeve, adjusting so that the seam lies at the rear or underside for minimal visibility.
Hand-stitch or machine-stitch the opening at the hook base to close the cover.
This method yields a clean, tailored look with minimal exposed stitching.
Option B: Direct Wrap and Secure
Lay the fabric flat, place the padded hanger along the center.
Wrap the fabric snugly around the padding, overlapping edges at the bottom side.
Secure the overlap with small hidden stitches or fabric glue.
Gently tug the fabric to ensure it is taut but not stretched, and that no wrinkles form.
Regardless of method, the aim is to achieve smooth fabric coverage, no visible adhesive marks, and a stable wrap that will hold up during repeated use.
Adding Decorative Details and Finishing Touches
With the hanger padded and wrapped, you can elevate its appearance with thoughtful finishing touches that reflect personal or brand style and reinforce durability.
Decorative options include:
Satin or grosgrain ribbon tied into a bow at the hook base for a refined accent.
Lace or embroidered trim along the outer edge of the shoulder for a vintage or boutique look.
Embroidered initials or small monogram labels sewn on one side of the hanger to personalize sets or collections.
Fabric-covered clips or tags for multi-piece garment sets (e.g., scarves and jackets).
When adding decorations, ensure they are securely attached, sit flat, and do not interfere with garment placement. Avoid heavy embellishments that risk shifting the hanger’s balance or causing padded bulk to sit unevenly.
Finishing checks:
Hang a lightweight garment and check that the hanger remains level.
Inspect under shoulder curves for fabric bunching or foam compression.
If any element appears loose, reinforce with stitching or glue.
By combining functional padding with decorative details, your padded hangers will serve both wardrobe care and presentation purposes.
Tips for Ensuring Long-Term Performance
To maximize the lifespan of your padded hangers, whether you made them for home use or for retail display, follow these best practices:
Use a consistent hanger model (such as Jinshunda’s adult plastic hangers) so that padding, fabric, and finished dimensions remain uniform across all units.
Distribute padding evenly across both shoulders and the central bar (if present) so that garments hang symmetrically.
Secure fabric tightly but avoid overstretching, which can cause seam failure or wrinkling over time.
Avoid hanging very heavy coats unless the base hanger is rated for weight and the padding is sufficiently firm. Jinshunda’s sturdy frame supports additional padding without sagging.
Store padded hangers away from direct sunlight and moisture. Excess humidity can degrade foam over time, and sunlight can fade fabric covers.
Periodically inspect the hangers for fabric wear, padding compression, or frame deformation, and refresh components as needed.
These ongoing maintenance practices help your padded hangers maintain shape, appearance, and function over many years.
Comparison Table: Padding Materials & Use Cases
| Padding Material | Softness | Durability | Best Use Case |
|---|---|---|---|
| Foam Cover (pre-cut) | Medium-firm | High | Uniform builds, professional batch |
| Polyester Batting | Soft | Medium-High | Everyday garments, casual wardrobes |
| Cotton Wadding | Soft-natural | Medium | Natural-textile wardrobes |
| Foam Strips | Firm | High | Heavier garments, tailored jackets |
| Microfiber Fill | Plush | Medium | Luxury items, designer collections |
Selecting the right padding style helps align with your wardrobe’s needs and ensures the hanger will perform visually and functionally.
Conclusion
Making padded coat hangers is a rewarding blend of craftsmanship and practicality. Starting with a high-quality hanger frame like those from Jinshunda, selecting appropriate padding and fabric, wrapping carefully, and finishing with decorative touches produces wardrobe hangers that are both protective and aesthetically pleasing. The availability of ready accessories such as Jinshunda’s Foam Covers further simplifies the process, especially for bulk production or professional use.
Whether for home closets, retail presentation, or premium garment care, a well-crafted padded hanger makes a difference. By following the methodical steps in this guide, you can create a set of hangers that elevate both garment support and closet presentation—combining longevity, style, and functionality in one bespoke solution.
Previous: How To Make Custom Woven Labels